High Power LED Modules
Touch the green filter button at the bottom right to find the exact module you are looking for.
Use the filters to the left to find the exact module you are looking for.
We keep a small quantity of popular LED modules in stock. Non-stocked modules are automatically added to our production queue when ordered. As of April 25, 2024, our production lead time has averaged 2 to 8 days .
×
| Module Series Comparison | 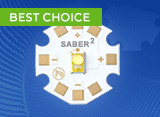 |  | 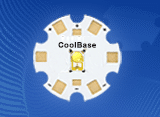 | 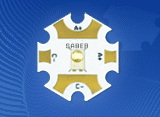 |
|
| Module Series | SABER2 | SinkPAD-II | CoolBase | Saber | |
| Base Technology | Super Pillar Aluminum MCPCB | Direct Thermal Path Aluminum MCPCB | Fiberglass FR-4 | Standard Aluminum MCPCB | |
| Thermal Peformance | Excellent | Excellent | Very Good | Good | |
| Solder Free Option | ✓ | ||||
| Product Status | In Full Production | In Full Production | In Full Production | In Full Production | |
| Cost | Best Overall Price | Competitive | Competitive | Competitive | |
AVAILABLE GEOMETRIES | 20mm Stars | ✓ | ✓ | ✓ | ✓ |
| 20mm Tri-Stars | ✓ | ✓ | ✓ | ✓ | |
| 5mm Squares | ✓ | ||||
| 10mm Squares | ✓ | ✓ | ✓ | ✓ | |
| 25mm Squares | ✓ | ✓ | ✓ | ||
| 25mm Rounds | ✓ | ✓ | |||
| 25mm Quad Rounds | ✓ | ✓ | ✓ | ||
| 25mm Quad Squares | ✓ | ||||
| 40mm 7-Up Rounds | ✓ | ✓ | ✓ | ||
| Rectangular | ✓ | ✓ | ✓ | ||
| Side Emitters | ✓ | ✓ | ✓ | ||
| Star/O's | ✓ | ✓ | |||
-
 Cool White (5650K), LUXEON Rebel ES LED on a SABER 2 Star Base, 235 lm @ 700mAPart ID: SW-01-W5Regular Price: $5.55 /eaCurrent Stock: 0Production Lead Time: 2-8 DaysQuantity discounts are available for this product. Click for details.
 -
 Cool White (5650K), Addressable LUXEON Rebel LEDs on a SABER 2 Tri-Star Base, 705 lm @ 700mAPart ID: SW-03-W5Regular Price: $12.55 /eaCurrent Stock: 0Production Lead Time: 2-8 DaysQuantity discounts are available for this product. Click for details.
 -
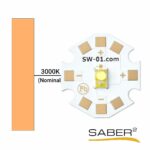 ANSI White (3000K), LUXEON Rebel PLUS LED on a SABER 2 Star Base, 95 lm @ 350mAPart ID: SW-01-T3Regular Price: $4.85 /eaCurrent Stock: 0Production Lead Time: 2-8 DaysQuantity discounts are available for this product. Click for details.
 -
 Cyan (505nm), LUXEON Rebel Color LED on SABER 2 10mm Square Base, 76 lm @ 350mAPart ID: SW-05-C2Regular Price: $8.38 /eaCurrent Stock: 0Production Lead Time: 2-8 DaysQuantity discounts are available for this product. Click for details.
 -
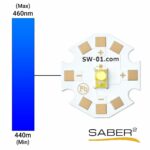
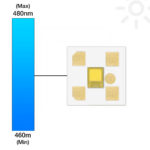
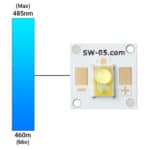 Blue (470nm), LUXEON Rebel Color LED on SABER 2 10mm Square Base, 41 lm @ 350mAPart ID: SW-05-B4Regular Price: $6.95 /eaCurrent Stock: 0Production Lead Time: 2-8 DaysQuantity discounts are available for this product. Click for details.
 -
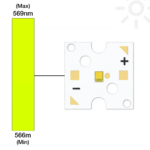 Lime LUXEON Z on a Saber Z1 10mm Square Base - 169 lm @ 500mAPart ID: SZ-01-H9Regular Price: $9.09 /eaCurrent Stock: 10Production Lead Time: 2-8 DaysQuantity discounts are available for this product. Click for details.
 -
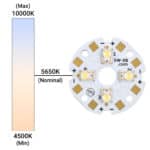 Cool White (5650K), LUXEON Rebel ES Addressable LEDs on SABER 2 Quad, 25mm Round Base, 940 lm @ 700mAPart ID: SW-08-W5Regular Price: $17.33 /eaCurrent Stock: 0Production Lead Time: 2-8 DaysQuantity discounts are available for this product. Click for details.
 -
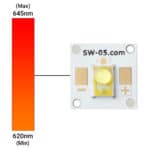 Red (627nm), LUXEON Rebel Color LED on SABER 2 10mm Square Base, 53 lm @ 350mAPart ID: SW-05-R5Regular Price: $6.28 /eaCurrent Stock: 0Production Lead Time: 2-8 DaysQuantity discounts are available for this product. Click for details.
 -
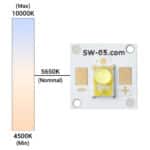 Cool White (5650K), LUXEON Rebel ES LED on SABER 2 10mm Square Base, 235 lm @ 700mAPart ID: SW-05-W5Regular Price: $5.48 /eaCurrent Stock: 0Production Lead Time: 2-8 DaysQuantity discounts are available for this product. Click for details.
 -
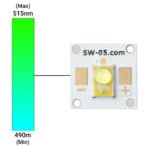
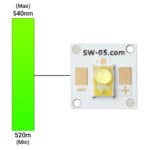 Green (530nm), LUXEON Rebel Color LED on SABER 2 10mm Square Base, 102 lm @ 350mAPart ID: SW-05-G4Regular Price: $8.38 /eaCurrent Stock: 0Production Lead Time: 2-8 DaysQuantity discounts are available for this product. Click for details.
 -
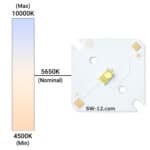 Cool White (5650K), LUXEON Rebel ES LEDs on SABER 2 25mm Square Base, 235 lm @ 700mAPart ID: SW-12-W5Regular Price: $11.13 /eaCurrent Stock: 0Production Lead Time: 2-8 DaysQuantity discounts are available for this product. Click for details.
 -
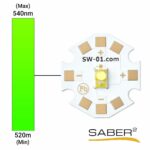 Green (530nm), LUXEON Rebel Color LED on a SABER 2 Star Base, 102 lm @ 350mAPart ID: SW-01-G4Regular Price: $8.45 /eaCurrent Stock: 0Production Lead Time: 2-8 DaysQuantity discounts are available for this product. Click for details.
 -
 Royal-Blue (448nm), LUXEON Rebel Color LED on a SABER 2 Star Base, 1030 mW @ 700mAPart ID: SW-01-V4Regular Price: $5.50 /eaCurrent Stock: 0Production Lead Time: 2-8 DaysQuantity discounts are available for this product. Click for details.
 -
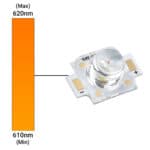 Red-Orange (617nm), LUXEON Rebel Color LED on SABER 2 Base with Side Emitting Optic, 72 lm @ 350mAPart ID: SW-04-E4Regular Price: $9.80 /eaCurrent Stock: 0Production Lead Time: 2-8 DaysQuantity discounts are available for this product. Click for details.
 -
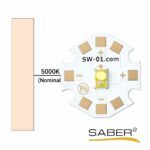 ANSI White (5000K), LUXEON Rebel PLUS LED on a SABER 2 Star Base, 106 lm @ 350mAPart ID: SW-01-T9Regular Price: $4.95 /eaCurrent Stock: 0Production Lead Time: 2-8 DaysQuantity discounts are available for this product. Click for details.
 -
 Blue LUXEON Z LED on a Saber Micro-Z1 5mm Square Base - 36 lm @ 500mAPart ID: SM-01-H3Regular Price: $6.83 /eaCurrent Stock: 5Production Lead Time: 2-8 DaysQuantity discounts are available for this product. Click for details.
 -
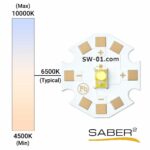 Cool White (6500K), LUXEON Rebel LED on a SABER 2 Star Base, 100 lm @ 350mAPart ID: SW-01-W3Regular Price: $5.50 /eaCurrent Stock: 0Production Lead Time: 2-8 DaysQuantity discounts are available for this product. Click for details.
 -
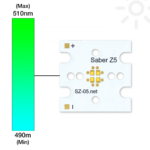 4 Series Connected LUXEON Z Cyan LEDs on a Saber Z5 20mm Base - 240 lm @ 500mAPart ID: SZ-05-H2Regular Price: $20.78 /eaCurrent Stock: 18Production Lead Time: 2-8 DaysQuantity discounts are available for this product. Click for details.
 -
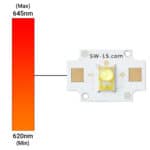 Red (627nm), LUXEON Rebel Color LED on SABER 2 10mm x 15mm Rectangular Base, 53 lm @ 350mAPart ID: SW-15-R5Regular Price: $6.25 /eaCurrent Stock: 0Production Lead Time: 2-8 DaysQuantity discounts are available for this product. Click for details.
 -
 Blue (470nm), LUXEON Rebel Color LED on a SABER 2 Star Base, 35 lm @ 350mAPart ID: SW-01-B3Regular Price: $7.90 /eaCurrent Stock: 0Production Lead Time: 2-8 DaysQuantity discounts are available for this product. Click for details.